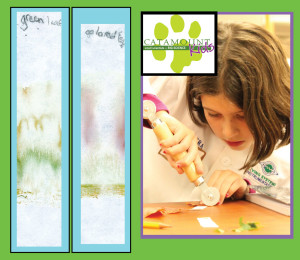
 In our Catamount Kids Elementary Program, one of our favorite labs is “Leaf Chromatography”. In Leaf Chromatography, we use paper chromatography to learn about the different pigments in leaves. We test leaves that are still green, and we compare those green leaves to leaves from the same type of tree that have already changed colors. This experiment is really easy to perform, and the really cool observation is that the kids can see how the green leaves contain a lot of green pigment, called chlorophyll, and also a lot of yellow pigment. In the leaves that have already changed color, there may be a small bit of chlorophyll (green) remaining, but mostly you are left with yellow, and if the leaf has progressed far enough, some reds, oranges or browns as well. We make the point here that the green leaves appear green due to the abundance of the green pigment chlorophyll. Once the chlorophyll starts to fade in the fall due to the shorter daylight exposure, the yellow color that was there all along starts to affect the appearance of the leaf. The brown, red, and orange color is usually due to the appearance of new pigments that develop only in the fall after photosynthesis slows down.
Doing Paper Chromatography at Home
•Glass Jar
•Popsicle Stick
•Coffee Filter
•Rubbing Alcohol
•Pigments (e.g. food coloring, magic markers, fabric dye, or fruits/vegetables)
Paper Chromatography is a really simple process to perform, and you can do lots of fun experiments right at home. All you need are some basic supplies you are likely to find already present in your home: a glass jar, a popsicle stick, a coffee filter, some rubbing alcohol, and some pigments to test (e.g. food coloring, magic markers, fabric paints/dyes, fruits or vegetables).
Here, we’ll walk through the procedure for doing a chromatography experiment to investigate the pigments in Sharpie® markers.
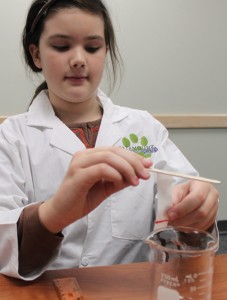
1. Start by cutting a small rectangular strip from a coffee filter. You want to be able to hang the coffee filter strip from the top of your glass jar using the popsicle stick (see Step 5), so make sure to cut the filter strip long enough so that it will reach almost to the bottom of the jar, but not quite touching the bottom of the jar.
 2. Once you have the filter strip cut, using a pencil, draw a line with about 1 ½ cm from the bottom of the filter strip. The line should go horizontally across the width of the filter strip. Make sure to use pencil for this line, as a pen or marker contains pigments that will interfere with your test. The pencil line will be the starting point. You will use this line to mark the position where you will apply your pigment sample.
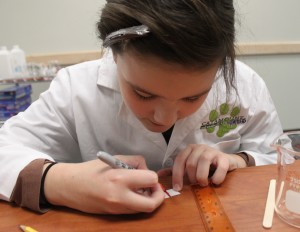
3. Take your pigment sample, e.g. marking pen, and draw over your pencil line back and forth several times. You want to apply a nice even coating of your pigment all the way across the width of your filter paper.
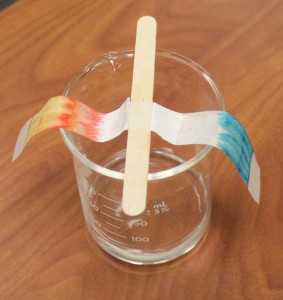
 4. Now attach your filter paper strip to the popsicle strip using a small piece of scotch tape. The filter strip should hang down from the stick. The pigment sample should be at the far end of the filter strip, away from the popsicle stick. You can also prepare two filter strips with different pigment samples and hang both strips from one popsicle stick, one on each side. This approach lets you test two samples per jar.
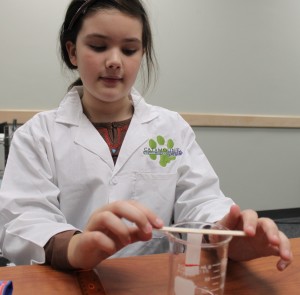
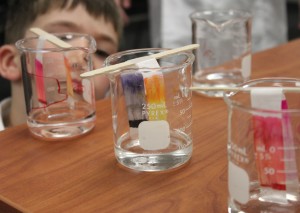
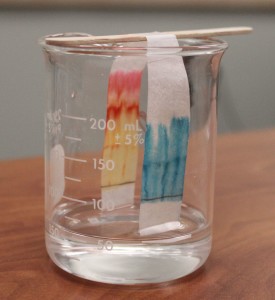
5. Place the popsicle stick on the top of your glass jar so that the filter strip hangs down into the jar. The filter paper should not touch the bottom of the jar. Also, the filter paper should not touch the sides of the jar. The filter strip should hang freely down into the jar, suspended from the popsicle stick. The pigment sample should be towards the bottom of the jar.
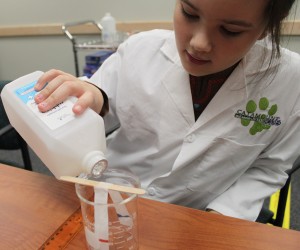
6. Carefully pour rubbing alcohol into the jar. Try not to let the alcohol touch the filter paper as it is being poured into the jar, since this will cause your pigment to smear. Pour the alcohol until you have a thin layer of alcohol in the bottom of the jar and the level of the alcohol just touches the bottom of the filter paper strip(s). You do not want to add so much alcohol that will cause your pigment to be below the level of the alcohol. Your pigment sample should be above the alcohol layer. You want the alcohol to gradually wick up the filter paper. As the alcohol reaches the pigment sample, it will carry the pigment along with it, up the length of the filter strip.
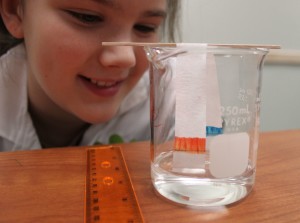
7. Let the glass jar sit undisturbed. You can watch the leading edge of the alcohol as it climbs the filter paper strip. The leading edge of the alcohol is called the “solvent front.” You will notice the pigment sample will smear as it is pulled up the filter paper with by the alcohol.
8. Stop the experiment by removing the filter paper strips from the jar when the solvent front is about 1.5 cm from the top of the filter paper. This should take about 45 minutes to an hour, depending on the length of your filter paper strip and the temperature/air currents in room.
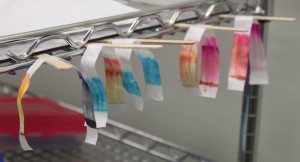
9. Once you have removed the filter strips, place them out to dry. After the filter paper has dried, you can examine the results. Did the results surprise you?
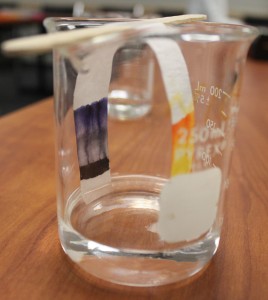
Depending on the sample you used, you may find some very interesting results. Black markers are especially interesting to examine. We found that black Sharpie® markers contain lots of purple pigment that advances with the solvent front, however, a lot of dark pigment did not leave the starting position.
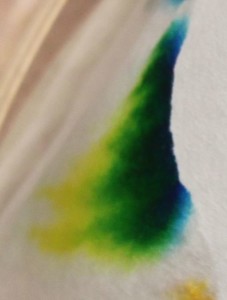
Green food coloring was also another interesting sample. We found that rubbing alcohol easily separates green food coloring into yellow and blue pigment components.
Here are some more fun examples of Paper Chromatography: